This lab is adapted from Andrea Vaccari.
Activity 0
Lab Partnership Planning
Before starting today’s lab assignment, exchange contact information with your partner and find at least three hours in your schedule during which you can meet with your partner to finish the lab. If you are genuinely unable to find a time, please come speak with me!
Reminder: you and your partner are a team! You should not move forward to one activity until you are both comfortable with the previous activity.
Getting Started
Create a file called lab8.py in Thonny and add the following line to the start of your program:
import turtle
Please don’t import turtle in a different way - this is the only way that works with the autograder.
Introduction
The goal of this lab is to write simple classes so that we can draw some more complicated shapes with the turtle (without using recursion!)
These shapes are described in files that we will read, so you will also gain some more practice reading a new file type.
In this lab, you’ll practice:
- Practice writing simple classes
- Practice reading a file
- Use the turtle again!
Activity 1: Writing the Point class
Our complex shapes will be represented with lists of Point objects, so the first thing you need to do is define a Point class.
Your Point class should have the following attributes and methods:
Attributes:
x: x-coordinate of the pointy: y-coordinate of the point
Methods:
__init__(): takes two arguments in addition toself(xandy) and initializes aPointobject by storing the value of the arguments in thexandyattributesdraw(): takes one Boolean argument in addition toself(withdots) and moves the turtle from wherever it might be to the location identified by thexandyattributes (see turtle.goto()). It also draws a dot (seeturtle.dot()) ifwithdotsisTrue.- To get credit for this, you must do it in the most efficient way possible (e.g., don’t call
gotomore than once, even if your turtle ends up in the right place in the end)
- To get credit for this, you must do it in the most efficient way possible (e.g., don’t call
scale(): takes one argument in addition toself(factor) and scales thexandyattributes by the value of factor. In other words, thexandyattributes are both multiplied by this scaling factor.translate(): takes two arguments in addition toself(txandty) and adds these values to thexandyattributes.
Write a Point class implementation that stores the attributes and provides the methods listed above.
After you are done, test out your class by creating a few instances. Is should behave as outlined below:
>>> p = Point(10, 20)
>>> q = Point(20, 30)
>>> p.scale(5)
>>> p.x
50
>>> p.y
100
>>> q.translate(15, 25)
>>> q.x
35
>>> q.y
55
>>> p.draw(False)
>>> q.draw(True)
After these commands, there should be a line from (0, 0) (where the turtle started) to (50, 100), another line from (50, 100) to (35, 55) and a dot at (35, 55). The dot should only be at (35, 55).
Activity 2: Writing the Segment class
Our shapes will be a collection of segments. In our drawings segments are any sequence of points.
The Segment class will have an attribute that stores a list of points that form the segment (similar to the Deck class storing a bunch of instances of the Card class from Tuesday’s lecture).
Your Segment class should have the following attributes and methods:
Attributes:
points: a list ofPointobjects that form a segment. We will provide you sample segments but, if you want to create your own shapes, keep in mind that a line segment will be drawn between to consecutive points so, when you draw your segment, make sure you put your points in the correct order.
Methods:
__init__(): takes one argument in addition toself(a list of points) and stores it in thepointsattributedraw(): takes one Boolean argument in addition toself(withdots) and draws the segment by iterating through the list ofPointobjects stored in thepointsattribute and calling thedrawmethod for each of the points passing thewithdotsvariable as argument.
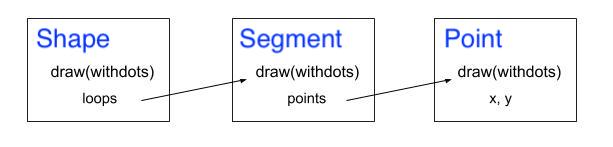
The following figure might help clarify the cascading relationship between the draw method for a Segment and the draw method for a Point:

Write the Segment class and then test your code with:
>>>  p0 = Point(0, 0)
>>>  p1 = Point(100, 0)
>>>  p2 = Point(100, 100)
>>>  p3 = Point(0, 100)
>>>  points = [p0, p1, p2, p3, p0]
>>>  segment = Segment(points)
>>>  segment.draw(True)
You should see a square with side length of 100! Notice that we need to include the initial point p0 at the end of the list of points since we want the segment to close in on itself. There should be a dot at every point since we passed True to the draw function.
Activity 3: Writing the Shape class
So we can make Point objects, and Segment objects, yay!
We can now create more complex shapes by introducing a Shape class, which simply stores a collection of Segment objects.
Shapes are stored in files as sequences of segments separated by “Break” (the actual word) that indicates the end of a segment and the beginning of a new one.
Between breaks, segments are represented by a sequence of x- and y-coordinates of a point. For example:
x1 y1
x2 y2
.
.
.
xn yn
Break
x1 y1
x2 y2
.
.
.
xm ym
Break
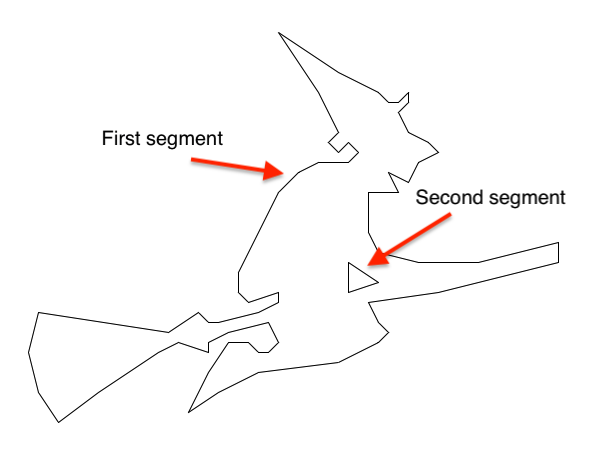
Take a look at a sample file with a shape made of a single segment: witch0.txt. You will notice that there is only one “Break” in this file (one single segment). A slightly more refined version (witch.txt) has two segments (two “Break”): the first segment contains n points and the second segment contains m points. If you look at other examples below, you might see that they are made of many more segments.
Your Shape class should have the following attributes and methods:
Attributes:
segments: list ofSegmentobjects (very similar to what you did before for the points inside the segments)
Methods:
__init__(): takes one argument in addition toself(a string with the name of a file) and opens that file, reads its content, and stores the points into separate segments. You will have to find out where the “Break”s are so that you can create segments and assign points to them.scale(): takes one argument in addition toself(factor) and scales thexandyattributes of every point of every segment by factor using the pointscalemethod.translate(): takes two arguments in addition toself(txandty) and adds these values to the x and y attributes of every point of every segment using the pointtranslatemethod.draw(): takes one Boolean argument in addition toself(withdots) and calls thedrawmethod for every segment object passing the argumentwithdotsto it. W e encourage you to start testing your code using the single segment (provided in thewitch0.txtsample).
Here is a hint on how to iterate over every line in the file and clean it up before using it, just in case you forgot the last few assignments and labs:
file = open(filename, "r")  # opens file called filename for reading (that's what the "r" means)
for line in file:
    # read the line, remove the '\n' as you have done previously
    # check if the line contains the 'Break' word (in which case you need to append the current
    # segment as Segment object to the segments attribute of the shape object)
    # split the line into the x and y coordinates
    # create a new Point object and append it to the points attribute of the current segment
    # in other words, you will have to read the coordinates in each line, append them as Point
    # objects to points attribute creating a segment that you will append the current segment
    # as Segment object if you find a "Break"
file.close() # closes the file so we cannot read from it anymore
Test your code out by instantiating a shape, and then calling it’s draw method.
witch = Shape('witch0.txt')
witch.scale(20)
witch.translate(500, 0)
witch.draw(True)
Again, note the cascading relationship between the draw() method for a Shape, the draw() method for a Segment, and the draw() method for a Point. Whatever is passed as the variable withdots into the Shape draw() method, is also passed to draw() for a Segment and, hence, draw() for a Point:
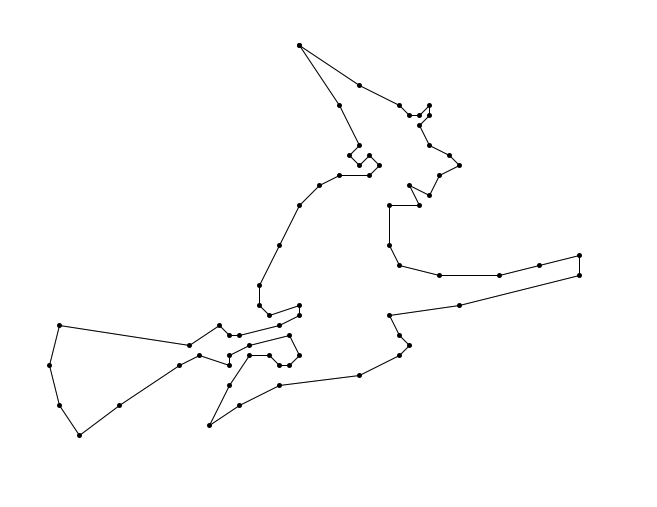
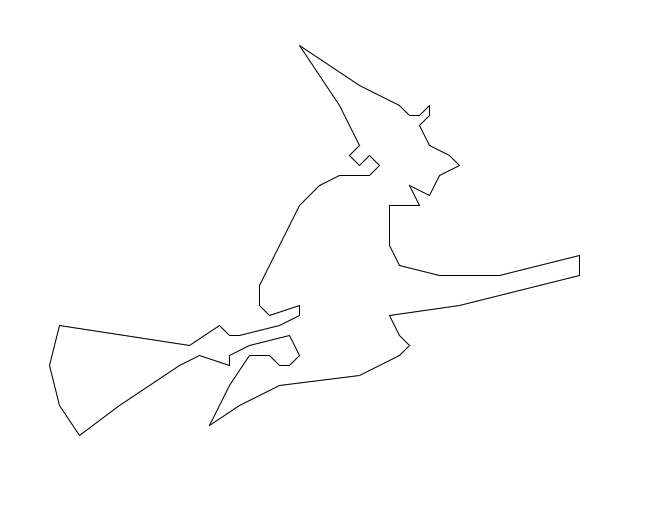
Here are some examples with the witch0.txt file. The witch0.txt file contains a single segment describing the outline of a witch. On the left, this outline is drawn with the withdots option as True. On the right, the withdots options is set to False.
Now onto shapes with multiple segments!
If you have multiple segments, every time you encounter the “Break” word in the file, you will need to append the current segment to the segment attribute in the Shape class and instantiate a new segment to store the next set of points. When drawing the segment objects, make sure you lift the Turtle pen after you finish drawing each segment, and place it back down when starting the drawing of the next segment. You should also lift the pen prior to drawing the first segment. You can lift the pen with turtle.penup() and put it down with turtle.pendown(). Otherwise, you will get lines connecting all the segments. Here’s a example:
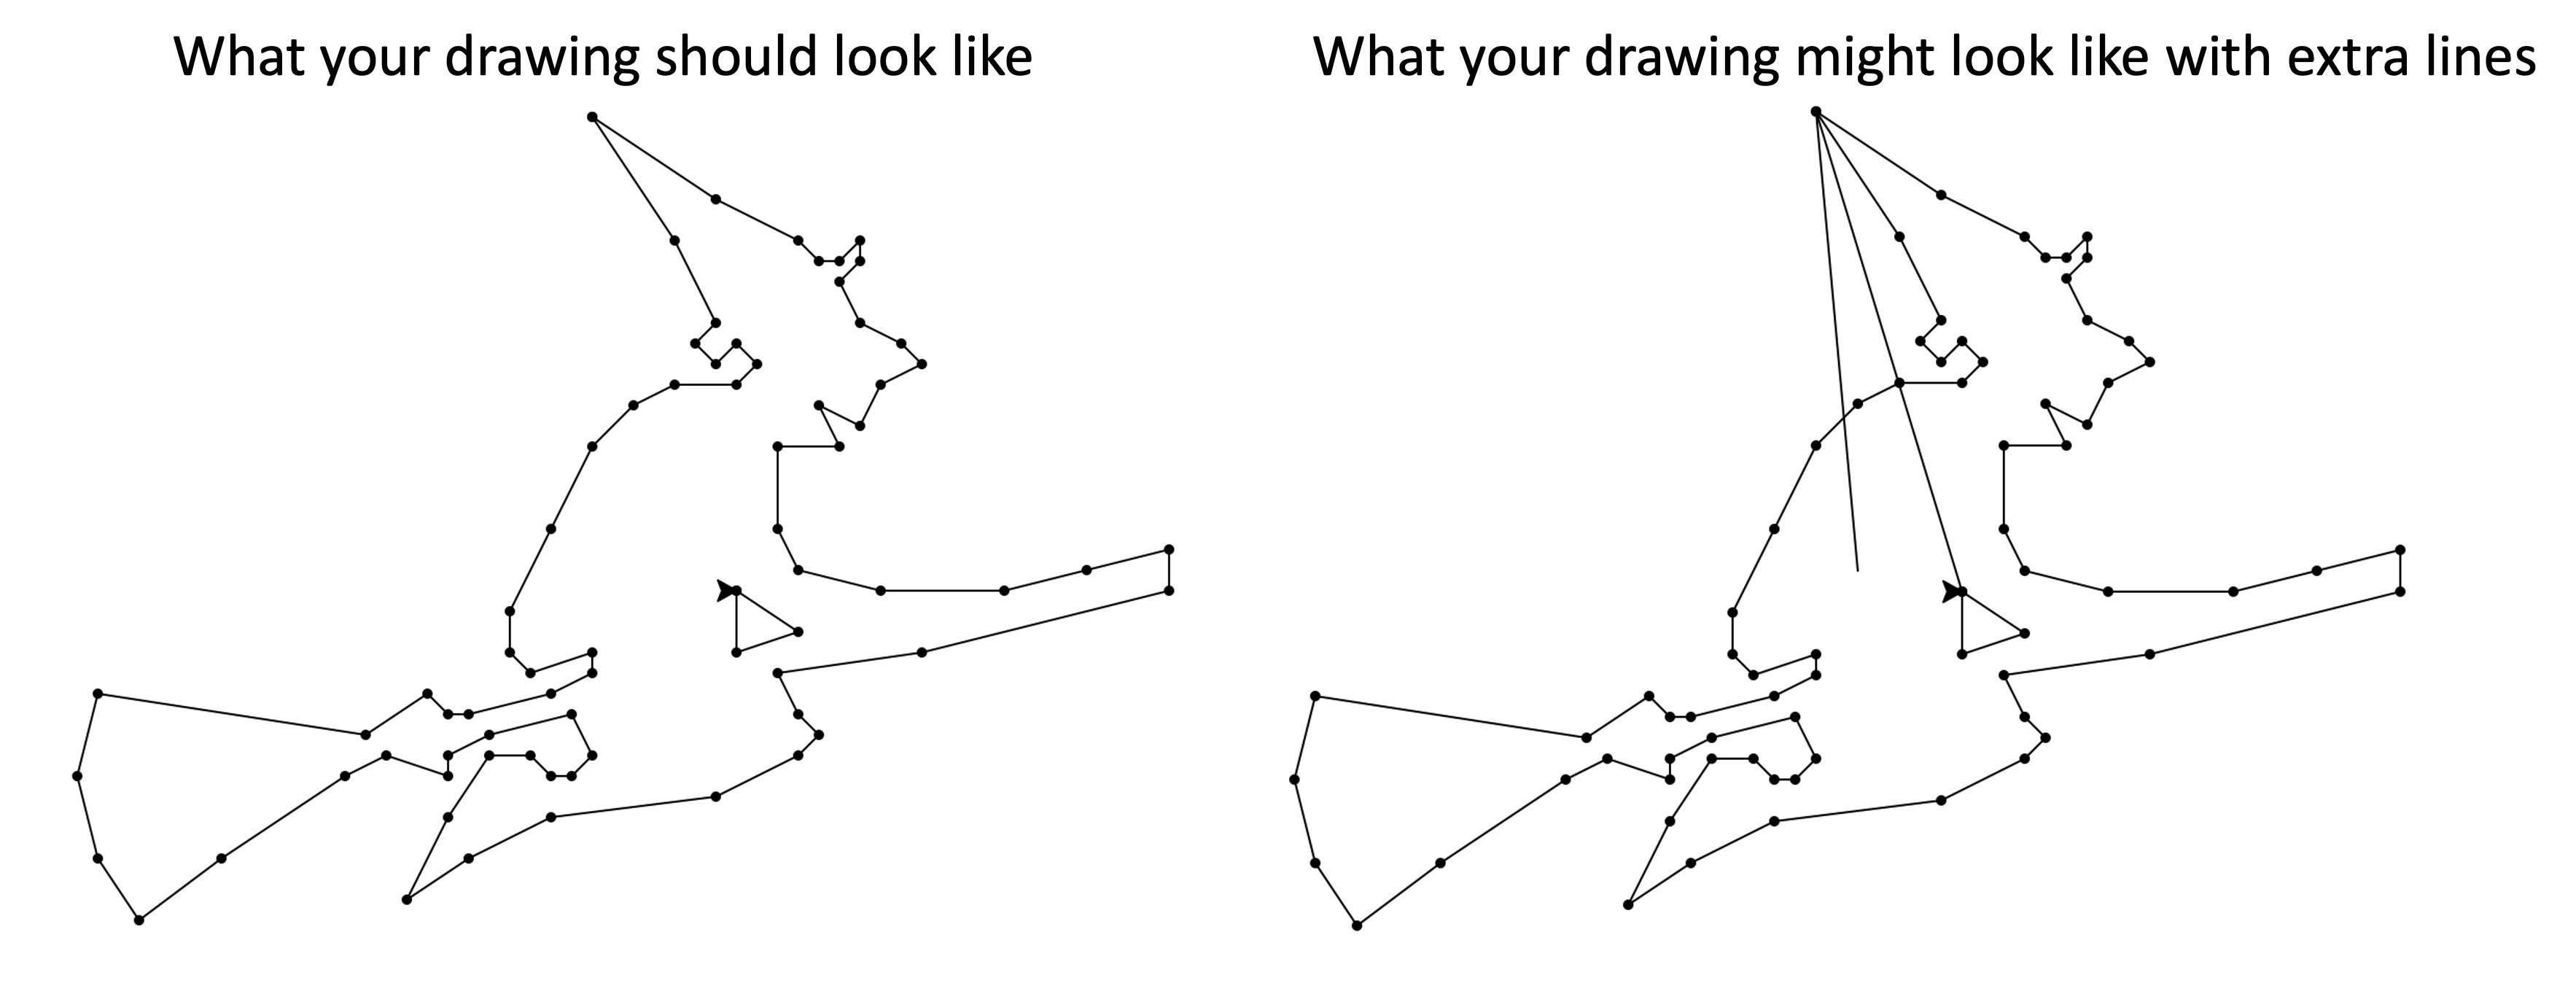
This piece is not autograded on gradescope. You’ll need to make sure that you don’t have these extra lines by inspecting your picture.
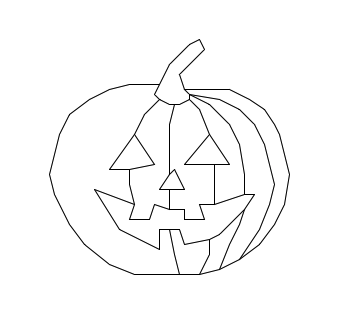
The images below contain several segments:
Play around with some of the sample files. Use the scale and translate functions to place at least three shapes on the same Turtle window. Pick from the following files:
- blackp.txt
- yoda.txt
- steve.txt
- bunny.txt
- cat.txt
- mike.txt
- jackolantern.txt
- witch0.txt (single-segment witch)
- witch.txt (witch with two segments)
- mystery.txt
Feel free to make your own points files instead and share them on edstem!
Turning in your work
Most of this lab is autograded. You need to turn in one python file that contains all three class definitions: Point, Segment and Shape. Name this lab8.py. In addition to the Python file, you should also take a screenshot of your final image containing three shapes and submit it.
Partner Feedback
Fill out the partner feedback form by the lab due date for participation points!